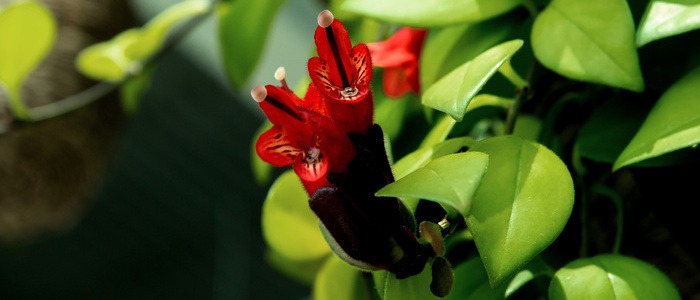
Are you bored with the usual plants and looking for something unusual to plant in your garden? How about getting a novelty plant for your hanging basket, which you can easily bring inside in the winter? Then the chenille plant is just what you are looking for. This plant is named because of its caterpillar-like flowers and belongs to the spurge family. The crimson accents of the chenille plant are perfect for adding that beautiful sunny textural interest to your garden.
Although the plant foliage isn’t that attractive or remarkable, the flowers are indeed breathtaking and extremely eye-catchy. This plant is common in tropical areas, and outside of that, they are generally grown in containers and can be brought inside during the harsh winters. As houseplants, the chenille plant can be grown throughout the year. Now that we have talked a bit about the chenille plants, let’s dive deep into learning about growing and taking care of this plant.

Chenille Plants Frequently Asked Questions
How do you take care of a chenille?
Chenille plants can adapt themselves to various soil types, which include clay, loam, and sand. Just make sure that the pH of the soil is anywhere between 5 to 7.5. The only soil this plant cannot thrive on is seaside soils as they are neither salt-tolerant nor drought-resistant.
Is a chenille plant a house plant?
Chenille plants grow best in full sun to partial shade if you are growing as a houseplant, grow it near a south-facing window where it will receive ample year-round light.
Taking Care of Your Chenille Plants
A healthy and well-cared chenille plant can become the star of your hanging baskets or window box. You can also combine these plants with complimentary flowers which require similar growing conditions like petunias and begonias. Keep in mind the following things when taking care of your chenille plant:
- Try growing these plants in partial shade or where the sun is full and bright. If you are looking for rapid growth, then plant them outside in the full sun. In case you are planting them inside, make sure the window is south-facing so that it can receive all the light it needs for growth.
- Ensure that the plant is never moisture-deprived. Maintain moderate moisture throughout the entire season.
- Keep misting the plants daily, especially around July to August, as this is the season for spider mites which tend to thrive under dusty and dry conditions. Misting the plant makes sure these mites are unable to thrive due to inhospitable conditions. Also, if your chenille plants are suffering from whiteflies, just use a hand vacuum when misting.
- Chenille plants are fast-growing; therefore, they need their regular dose of fertilizers. To support this plant’s development and flowering, fertilize your chenille plants every week. For fertilizer, just use half-strength flower fertilizers. When you start noticing yellow leaves, mix some manure with the fertilizer and use it in the soil.
- Chenille plants can adapt themselves to various soil types, which include clay, loam, and sand. Just make sure that the pH of the soil is anywhere between 5 to 7.5. The only soil this plant cannot thrive on is seaside soils as they are neither salt-tolerant nor drought-resistant.
- Chenille plants have a tropical origin, so they cannot bloom below temperatures of 60 degrees F. The easiest way to remember the planting time of the chenille is by following your tomato planting schedule. So simply put, plant the chenille plants when the weather is perfect for growing your tomatoes.
Propagating the Chenille Plant
Growing chenille plants at home is easy. This plant can be propagated through seeds or stem cuttings. All you need to do is sow the seeds outdoors in containers, pots, or the ground making sure they receive a good amount of sunlight and moisture.
The more popular and common way of propagating these plants is through stem cuttings. Provided you live in a place that remains humid and warm throughout the year. And if that’s not the case, just plant them in containers and make sure you bring them inside your home as soon as winter hits.
To propagate these plants from stem cuttings, just follow these simple steps::
- Grab a pair of sharp pruners and then cut a portion of the stem (preferably of 5 inches length) from a healthy chenille plant. While cutting, makes sure you are cutting it just below a bud or a leaf and also ensure that the stem has at least three to four leaves on it.
- Next, fill in a container with sand or a mixture of half perlite and half peat moss. The container needs to be 3 to 4 inches and should have a drainage hole at the bottom.
- Set this mixture in some water to make it damp and then remove it immediately to make sure the soil doesn’t turn soggy. Then with a pencil, make a small hole in the mixture.
- Plant this stem cutting in the small hole you made using the pencil and then tap the soil around the hole to make sure it is firmly set in.
- The next step is placing this container in any plastic bag and securing the plastic bag with a rubber band to the stem.
- Place this container in a spot where it won’t receive direct sunlight and keep checking on it regularly. It is going to take around four weeks for the plant cutting to get rooted.
- Once the plant cutting gets rooted in the soil, remove it from the plastic bag. An easy way to determine whether the stem has been rooted is by giving it a slight tug. In case you feel resistance when tugging, remember it’s a sign of the cutting being firmly rooted.
- The last step you need to do is move the plant in direct sunlight while making sure the soil remains moist and not soggy. Once the roots become at least 1-inch long, move it to a bigger container of around 6 inches. And voila, you have your new plant.
Pruning And Protection of the Chenille Plant
Chenille flowers are also known as “catkins.” The flowers tend to grow to almost 20 inches, and the most common color of these flowers is red. But it is also available in other colors like pink, gold and yellow. For maintenance and pruning, keep removing the wilted flowers just below the base at the stem during its blooming season.
To encourage new flowers and growth, prune the plant back around 8 inches. Also, remember to use sharp shears every time you are pruning the plant. Keep in mind that the cuts need to be clean and quick to reduce the chances of the plant getting infected. Lastly, make sure that you disinfect and thoroughly clean the pruning shears after every use.